How to Buy USDT on Binance P2P in India (UPI, IMPS, Bank Transfer)
Need to finish setting up your account? Read the Binance registration and security guide. Complete registration and security guide →
Binance P2P lets you buy USDT directly from other users and pay them in rupees by UPI, IMPS or bank transfer. You never deposit INR into Binance: Binance holds the seller’s USDT in escrow until the seller confirms your payment arrived, which can help resolve an order dispute but does not guarantee recovery of a bank payment. A careful first purchase takes 15–30 minutes. This guide covers every step, the Indian specifics (UPI limits, TDS, bank freezes) and what to do if something goes wrong.
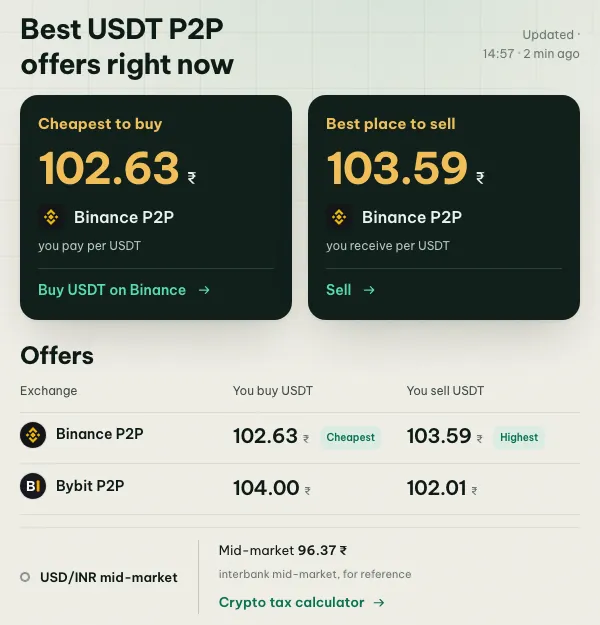
P2P prices move through the day and differ by payment method. Check the live INR board before you order.
Before you start
1. A verified Binance account. Identity verification (KYC) for Indian users uses your Aadhaar or passport, usually your PAN as well, and a face scan. Binance is registered with FIU-IND, which is why it asks for these.
2. Two-factor authentication. Turn on an authenticator app or passkey.
3. A bank account or UPI ID in your own name. The payer’s name must match your Binance name. Sellers check this, and third-party payments are the main source of fraud complaints and frozen accounts in India.
4. Your payment method added under P2P → Payment methods: UPI ID, bank account (IMPS/NEFT), or another accepted method.
5. UPI limits checked. Most banks allow up to ₹1 lakh per day by UPI, often less in the first 24 hours after you set up UPI on a new phone. For larger amounts, use IMPS or bank transfer.
Choosing how to pay
| Method | Offers | Good for | Note |
|---|---|---|---|
| UPI | Most | Small and medium amounts | Fast; daily limits apply |
| IMPS / bank transfer | Many | Larger amounts | Check the seller accepts your bank |
| PhonePe, Google Pay, Paytm | Some | Small amounts | Often a little dearer |
| Digital Rupee (e₹) | Some | e₹ wallet users | Needs an e₹ wallet from your bank; priced separately |
coinglee shows the price for each method separately: UPI, bank transfer, Digital Rupee.
Step 1: Open P2P and filter
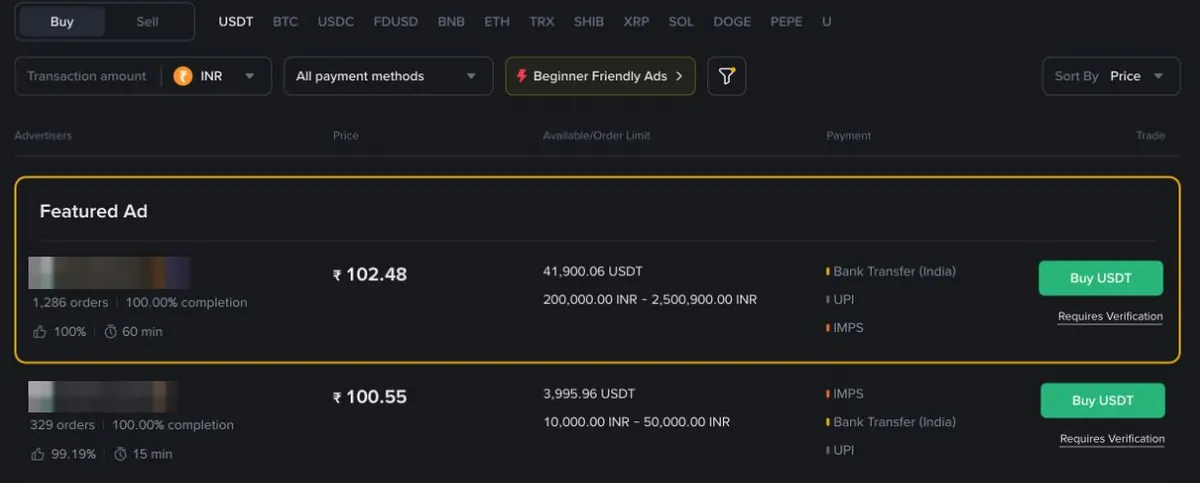
In the Binance app, open P2P, choose Buy, USDT and INR.
- Enter the amount you want to spend, for example ₹20,000, so only offers that accept it remain.
- Filter by payment method.
- Optionally show verified merchants only.
Step 2: Read the offer
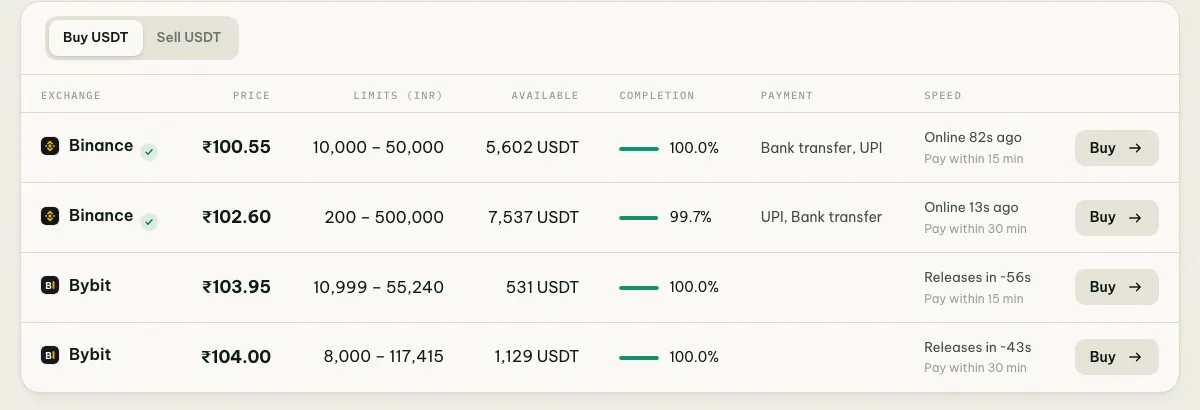
| Field | What it means | Look for |
|---|---|---|
| Price | Rupees per 1 USDT | Low, but not far below everyone else |
| Limit | Smallest and largest order | Includes your amount |
| Available | USDT left in the offer | More than you need |
| 30d orders / completion | Recent trades and share completed | 50+ and 95%+ (coinglee’s thresholds) |
| Online / release time | How active and quick the seller is | Online recently |
| Payment window | Time to pay | 15 or 30 minutes |
Offers with a very attractive price often accept only a few hundred rupees, or have a high minimum. coinglee’s reference price uses offers that can take about ₹20,000.
Step 3: Place the order
Tap Buy, enter the amount and check the USDT you’ll receive, then confirm. The order shows a countdown and the seller’s UPI ID or account.
Read the seller’s terms. Some ask you not to write anything in the payment remark, some refuse certain banks, and some want extra verification for first-time buyers. If you can’t follow them, cancel before paying. Too many cancellations in a day can temporarily block P2P.
Step 4: Pay exactly what the order says
- Pay the exact amount to the UPI ID or account shown in the order, from your own account.
- Check that the name your UPI app shows for the payee matches the seller’s name in the order before you enter your PIN.
- Note the UTR / transaction ID.
- Tap Transferred, notify seller, only after the payment has gone through.
Never pay a UPI ID or account sent in chat that differs from the order, and never approve a “collect request”. When buying, you send money; you don’t approve requests.
Step 5: Receive the USDT
The seller checks their account and releases the USDT, usually within minutes. It arrives in your Funding wallet. For withdrawals, see which USDT network to use.
TDS and tax
India taxes gains on crypto at 30% plus 4% cess and requires 1% TDS on transfers once yearly thresholds are crossed. On P2P, the law makes the buyer responsible for deducting TDS when paying the seller. Some exchanges handle this inside the order, so look for a TDS line and keep your records. Work out your numbers with the crypto tax calculator and read 1% TDS and 30% tax on crypto. This is general information, not tax advice.
What it really costs
Check the current Binance P2P fee schedule and the order confirmation. Taker fees can depend on the fiat market and account, so the quoted price is not necessarily the total cost. Add any applicable fee, payment charge and withdrawal cost separately. Costs come from the price you accept, which varies between exchanges and payment methods, and the spread between buying and selling. See the converter.
If something goes wrong
| Problem | What to do |
|---|---|
| You paid but the seller hasn’t released | Send the UTR in the chat; when the timer ends, tap Appeal and upload proof |
| UPI debited but the seller says nothing arrived | Share the UTR; UPI failures usually reverse within a day. Don’t pay again |
| The timer ran out before you paid | The order cancels; open a new one, never pay into an expired order |
| The seller asks you to cancel after you paid | Never cancel after paying. It returns the USDT to the seller |
Read how to trade P2P safely in India, especially the part about frozen bank accounts.
Read the public offer screen before opening an order